Total Pageviews

2009 Jeep Wrangler X

2009 Jeep Wrangler X
Project-JK-Supercharged

Sunday, June 28, 2009

Battery Cables Extended (Lengthened)

Here is some pictures of the battery cables being extended in preparation of relocating the battery box towards the front of the engine compartment where the current air-box will be removed.
Ground Lead Cut...

One (of two) Red Lead splices...

Crimp and Solder...

All Done ...

Friday, June 26, 2009

Final phases of the prelims coming to a close...

The whole install should take about 6-8 hours, but I am a single vehicle family, and I want to minimize the impact (down time) as much as possible. So, I have already taken a few preliminary steps like mount the "black box", the map sensor, the AFR UEGO sensor, and the Boost pressure sensor.

I still have a few more prelims -
1) shorten the heater hose line by 3-inches - which means I have to drain about a gallon or so of engine coolant, 2) lengthen the battery cables to prepare for the relocation of the battery to where the OEM airbox currently resides, and 3) change the oil and filter (AMSOIL 0-20W full 100% Synthetic). I plan to get these steps done by this weekend, then the real fun begins!

Here is a brief outline of what has to happen to complete the entire SDS install:

  • Remove the battery and set the EVAP valve out of the way
  • Cut out the battery box to make room for the Vortech SDS
  • Remove the Airbox and air intake
  • Re-locate air sensor
  • Re-locate EVAP value
  • Change the spark plugs with the provided NGK Iridium IX (one step cooler)
  • Make cuts to the airbox location to accomdate the new battery hold-down
  • Remove OEM belt and water pump pulley ( will put pulley back on after SDS mounting bracket is installed).
  • Attach SDS mount to front engine block
  • Attach SDS to engine mount
  • Attach all air intake tubes / filter
  • Add new drive belt
  • Connect all vacuum lines
  • Splice in all "black" box wiring
  • Make connections for the Meth Boost pump (lines, wires)
I may have missed a step or two, but I think you get the picture...

Wednesday, June 24, 2009

Wednesday Night at the Drag Races

Well, I had a little fun today, I took my stock Jeep out to the Wednesday night drags here at Infineon Raceway in Sonoma, CA. For $25 bucks you can race any street legal vehicle. They have brackets for High School kids, Sport Street (my class) for 4 and 6 cylinder engines, Street for the V8's and muscle cars, and, of course, the pro-comps, bikes and the like. I wanted to get a baseline for this Jeep of mine prior to beefing up the HP. So here's how it went down. My first trial run (first time ever), I ran 18.016 seconds with a top speed of 73.07 MPH. The air temp was 84 degrees and I was bucking a headwind. The second trial run was 17.906 and 73.78 MPH, the temp had dropped about 10 degrees to 74.

So now I had to set my dial-in ET. If you don't know about drag racing, your dial-in number is what you think your best ET will be. If you can hit you dial-in combined with a quick reaction time (launch) you can expect to be side-by-side at the finish even if the other guy is quicker, as long as you don't go faster than you dial-in you win if you hit the finish line first.

With the temperature continuing to fall, I went with what I thought would be a conservative 17.85 secs. What I found out is just how much effect air temperature has on an engine. By the time my first heat came, the air temp had fallen another 8 degrees, down to 66. Needless to say, I broke-out at 17.696 (74.53 MPH). To breakout means you ran faster than your dial-in and you lose, unless both cars breakout, then the one closest to his/her dial-in wins.

My first experience at drag racing was fun and I learned a few things to boot!

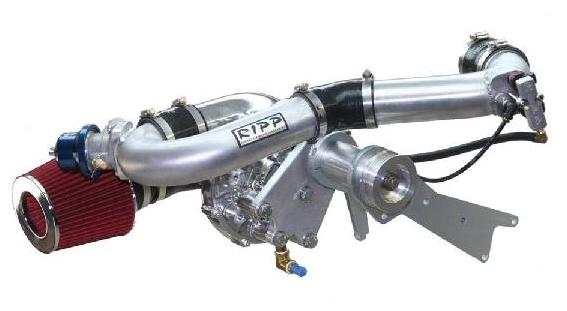
I now have my run slips for my scrap/log book and, along with some baseline dyno pulls, can really begin to concentrate on the SDS install:)

Monday, June 22, 2009

Gauges, A Must Have for a Supercharged Engine


Two gotta haves for running a SDS is a good Air/Fuel Ratio gauge to monitor if your running lean (bad for motor) or rich (bad for fuel mileage) and a manifold pressure (aka:Boost) gauge.
I picked up AEM digital gauges for both. The AEM Wideband UEGO AFR with the Bosch sensor (p/n 30-4100) and the -30-35 Boost (30-4406).
While installing the gauges, I added a DIY Green light indicator for when the Meth Boost / Intercooler Injection kicks in. The meth/water injector has a user selectable set of controls for setting the manifold pressure you want the injector to lick in. The indicator light will give me a positive confirmation that it is working at the specified control points.
I made the indicator from a simple 12v green light and a short piece of 5/16" rubber tubing. The wires for the light are spliced into the power feed line from the Injector controller to the Injector pump.

Sunday, June 21, 2009

Map Sensor (Blue) and Fuel Control Install

Well, I have managed to get the basic electronic components mounted under the dash board, and all the wires are connected (pre-wired) on this side. I have not tackled the splicing of the other ends into the ECU yet. That will come later, after I begin the main installation of the other major components, such as the battery re-location bracket, the SDS mount. the Vortech Supercharger, the fuel lines, all the vacuum lines, and the meth-boost injector. I'm still in the prelim side of things for now.


I also managed to get all the vacuum lines labeled according to location and purpose. I adjusted the Blow Off Valve (BOV) to the recommended depth of three/four screw-threads showing above the lock bolt.

I need to find a good battery cable crimper that I can rent (they are just too expensive to buy for a one-time deal like this)!

Saturday, June 20, 2009

Pre-liminary Work

So, this afternoon I managed to get the wire harness for the SDS controller through the firewall, along with the AEM boost gauge pressure-sending wire bundle. I wired in the switched-power lead and ground wires for the boost gauge and made sure that the wires for the AEM AFR wideband O2 sensor were all solid. After havind done this, I notice that the AFR readings seem more stable, not bouncing all over the place. This leads me to believe that my orginal connection was not "tight". Maybe a bad ground or power or both.

Friday, June 19, 2009

It’s Here, It’s Here – the SDS is here!

Well I received the Supercharger kit today, and at first glance it does appear a bit daunting, but heck, it isn't fun if it isn't a challenge, right?!

Anyway, the instructions on the CD seem pretty straight-forward and I believe I have the skills (shucks, I built a Chevy small block 350 from the bottom on up and it ran like a charm in my '70 Chevelle SS).

There are a few things I can get done before I tackle the big parts, like pre-installing (mounting) the Controller module and the Boost Map module inside the cockpit and, oh yeah, the AEM boost gauge as well. I might even cut and splice the battery leads beforehand to get that out of the way. I already gapped the NGK Iridium IX spark plugs that came with the kit at RIPPMODS recommended .032 " (OEM spec is .050").

Also will be changing the oil and filter per recommendation, I plan on using Royal Purple 5W-20 (OEM spec), although I considered the Castrol Edge 5W-30 weight, being California, summer time too...also picked up a K&N performance oil filter.

In any case, I can't start right away since I still need to get a baseline benchmark of my stock setup so I will know what kind of performance gains were really talking here? I have the Palmer performance PCMSCAN software and ELM OBD-II Interface working now, just need time to record some data.

I will keep you posted with pics and everything...

First Major Mod - SDS


My first mod will bolt on 100+ hp… the RIPPMODS Supercharged Delivery System or SDS for short:


I will be doing the installation myself (and the aid of the techs from Rippmods.com)


The link for this kit is: JK SDS from RIPPMODS


Will be posting my progress and pictures too!

Introduction

Welcome to my blog on my Jeep JK (2009) modifications. Stay tuned to some major (and minor) mods that will blow your socks off….